Washi Tape Storage Box Tutorial
The party's over. Time to look forward to new creative challenges. But first - get organized! Today's project: Washi Tape Storage Boxes. Each pretty print box holds approximately 10 rolls of washi tape. You can make the box in purple or pink, with- or without a ribbon handle (the ribbon-handled box reminds me of animal crackers).
Here are your free printables (tut follows):
WashiTapeBoxPink1of2.pdf
WashiTapeBoxPink2of2.pdf
WashiTapeBoxPurple1of2.pdf
WashiTapeBoxPurple2of2.pdf
WashiTapeBoxPink1of2.svg
WashiTapeBoxPink2of2.svg
WashiTapeBoxPurple1of2.svg
WashiTapeBoxPurple2of2.svg
Here's the tut:
Washi Tape Storage Box
1 Here are all the pieces, cut out and prepped. Score the folds with a fine-point embossing tool held against a small metal ruler. You need about 45cm/18in of ribbon if you are making the box with the handle. Double-sided tape is placed on the top side of the tabs, and also underneath the straight long edge. Glue the reinforcements over the holes for the handled version.
2 Attach the side panels to the base of the box between the tabs, on either side.
3 Pic above shows the side panels attached to the box body.
4 Next, attach the small tabs to the underside of the side panels. Attach the two at the box front first.
5 Turn under the front lining and smooth it in place. It is attached with a strip of d/s tape under the bottom edge.
6 Next, attach the two remaining short tabs to the underside of the side panels.
7 Pic above shows what the box should look like now. Note that the back of the lid has not been scored - this is so it will roll smoothly to close, and fit the contour of the washi tape rolls more precisely.
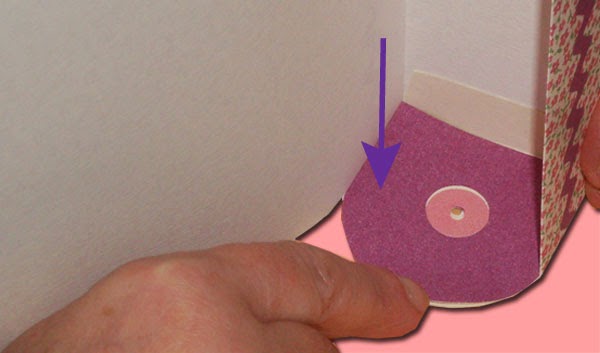
8 Stick the side liners onto the underside of the side panels. If making the handled version, make sure the holes align. Smooth the panels down and tamp the bottom corners down.
9 Use a tapestry needle to thread the ribbon ends through the holes.
Double or triple-knot the ribbon tails so they don't pass through the holes.
10 To close the box, roll the lid down and insert it under the front edge.
It is a good idea to prime the lid - shape it with your fingers - so that it curves gently. If you want a super-deluxe box, you can cut a piece of paper to line the base of the box.
So, that's it. Have fun organizing your washi stash! (If you accumulate more tape, just make more boxes!
More washi boxes here: Washi Tape Gift Box , Washi Rolls Washi Tape Storage Box


No comments:
Post a Comment