Saturday 28 November 2015

The Art of Paper Weaving, by Anna Schepper and Lene Schepper. Review.


46 Colorful, Dimensional Projects

By Anna Schepper and Lene Schepper

Quarry Books 2015

Paperback £15.99 UK/$24.99US/$29.99CAN

ISBN 978-1-63159-039-9

Star rating: *****+


Have you ever made a woven paper heart? Paper weaving is a craft tradition in Denmark and Norway.  Anna and Lene, the Danish mother and daughter team behind Paper Matrix, have taken the art of paper weaving and updated it for the 21st century.  From a papercrafter’s viewpoint, their book is about exciting as it gets.  What do you get when you combine reverence for tradition  past, a deep understanding of geometric principles (Anna is a trained architect),  and an assist from some powerful design software? – the unmistakable genius of Paper Matrix.

If this book were only a project book, it would have earned its five star rating. But it goes beyond the presentation of  wonderful projects – it aims to build skills so that eventually the reader will be able to combine ideas and eventually innovate. Wow. 

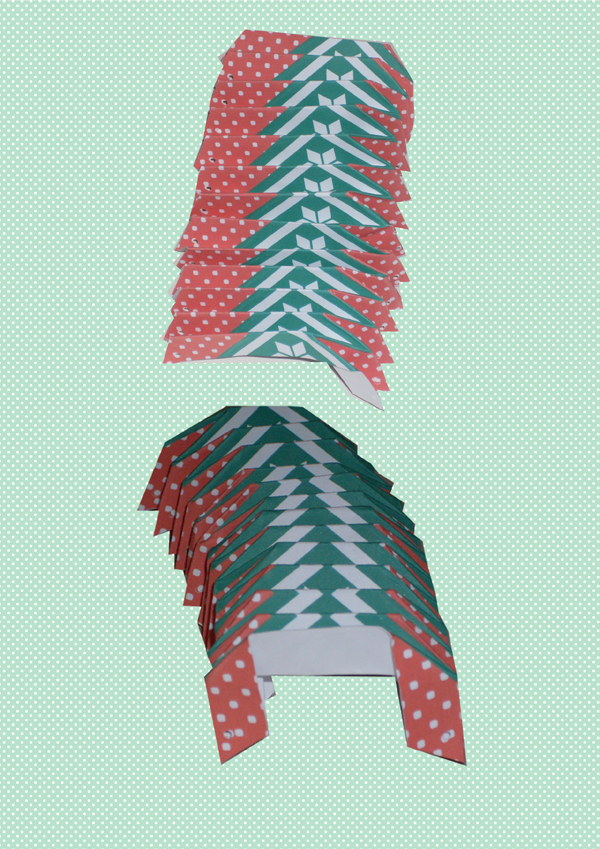
Beginning with an attractive triangle bunting, the book introduces designs of increasing complexity. The triangle bunting, no less attractive for its simplicity, teaches several skills used in more complex paper weaving – weaving in rows, weaving around a centre, and sliding. The book then moves on to the Basic Cone – a cornet shape with a handle that would make an ideal tree decoration. Before weaving, the two pieces of the cone template look like angel wings! Invaluable tip – they are interwoven over a paper cone armature. Next come spheres – the swirling pattern pieces are awesomely beautiful in their own right. The last basic shape is the basket, the most functional  design.

With basic skills established, the book moves on to ever more intricate creations – hot air balloons, and exquisite shaped creations like onion domes. The Heart in Hand, based on 1840s friendship tokens, would make a wonderful Valentine’s project. There are sections of themed projects, such as Magic Circus, and Tivoli Gardens (Copenhagen’s famous amusement park). 

A delightful section at the back of the book, Pretty Handles, shows a variety of interwoven handle options. The handle strips can be interlaced in various ways to produce different designs. There is also a nifty spread, On Colors and Patterns, that tells you how to interweave the coloured strips to produced desired pattern results (takes me back to when I studied woven textiles).

The projects are accompanied by carefully detailed step-by-steps, illustrated as required. The back-of-book templates are full-size, with more available online. 

How do you go about reproducing the intricate design templates? The authors suggest three different methods:  photocopier and scissors; scanner, printer, and scissors; or scanner, software, and digital cutter. (Surely the last method is the optimum method for crafting professional-looking results.) So - not exactly easy-when-you-know-how - but a fascinating creative skill to learn and build upon.

I have previously reviewed Fletvaerk, Anna & Lene Schepper’s Danish-language title, on my blog. Although there is some overlap in the content of the two titles, The Art of Paper Weaving is a more comprehensive skill-builder.

If you are looking for a Christmas gift for a papercrafter, then the unmistakable magic of Paper Matrix should be top of your list – The Art of Paper Weaving.


Wednesday 25 November 2015

Ski Sweater Drawstring Gift Box Mini Tutorial

I have a thing for ski sweaters - a cosy and comforting  motif. So, in addition to yesterday's dinky cubes, here are some drawstring gift boxes. The top closure forms a pretty star shape. This project would be thoughtful gift packaging for a knitting or crochet enthusiast, or it would make an ideal container for a small handmade item - like a pair of gloves or mittens.

There are two different co-ordinating colour combos. You can place the boxes side-by-side and the jumpers form a continuous repeat. Cool.

I have embossed the folds with a Silhouette Curio machine, but I also provide .pdf files for those of you who haven't yet gone digital.

Here are your free printables:
SkiSweaterDrawstringBoxA.pdf 
SkiSweaterDrawstringBoxB.pdf 
SkiSweaterDrawstringBoxC.pdf 

SkiSweaterDrawstringBox.studio3 

For each gift box, you need:
3 pieces of photocopier card
45cm (18in) of 3mm(1/8in)-wide ribbon; tapestry needle
2 seed beads; sewing needle, thread 
Craft thread
Double-sided tape and/or PVA tacky glue

To score by hand:
Fine embossing tool, small metal ruler

To make up:
1 Print the design and cut out the box pieces. For each box you need two body pieces and a base. (The reinforcements are optional.) 

If cutting out with a Silhouette Curio, turn on the registration marks and print out the box body. (Pic below shows box on cutting mat).
Next, slide the cutting mat on top of the box body, with edges aligned. Use Advanced cutting - cut by colour. Emboss the blue lines with the fine embossing tool (pic below). 
Next, cut out the box body (purple lines, ratchet blade). Repeat for the remaining box body piece. Cut out the box base and the tags by standard cutting method.


If cutting out by hand - cut out with scissors and mark the fold lines with an embossing tool held against a metal ruler.

2 Pic above shows how to piece the two body pieces. Glue reinforcments over the holes on the wrong side before joining together to make a ring. Crease all the folds. Mountain folds at the peaks, valley folds in between.
3 Glue (or tape) the tabs onto the base to complete the box (see pic above).
4 Using a tapestry needle, lace the ribbon through the holes. Thread a bead on to each ribbon end. There's a trick to this. Thread a sewing needle with sewing thread and stitche through the ribbon end. Re-thread both thread ends through the needle, then pass through the hole in the seed bead. You can now slide the seed bead up the ribbon.
Tie a knot below the bead and trim the ribbon end. I seal the ribbon tails with a smidge of PVA glue applied with a cocktail stick.

5 The gift tag is tied on to the drawstring using a bit of craft thread.
Enlarge the pattern pieces to make bigger boxes. If using the Silhouette Curio, the long base will be required for bigger box sizes.


Tuesday 24 November 2015

Winter Woollies Gift Box


These dinky cubes (4.5cm/1-3/4in) are great as party favours - they are stackable and fun. They are decorated with a seasonal ski sweater motif. If you put a ribbon hanging loop in a cube corner, then you have a tree ornament!

I have given you two versions - .pdf printable, or print-and-cut for a Silhouette Curio machine. The Curio will emboss the fold lines and cut out the template pieces for you. 

Here are your free templates:
SkiSweaterGiftBox.pdf 
SkiSweaterGiftBox.studio3 

The .pdf printable is all-in-one.

The Silhouette Curio cube is in two pieces.
Winter Woollies Gift Box How-Tos:

.pdf Version:
Cut the box out (photocopier card is ideal), score the fold lines with a fine-point embossing tool and a small ruler, crease the folds, join the one flap to complete the box. 

Silhouette Curio Version
1 Open the file. The registration marks are turned on. Print the box portion on the mat on to photocopier card.
2 Place the print-out on the embossing mat. Move the folding guide over the box print-out, with edges aligned. Choose Advanced cutting.Place the fine embossing tool in the righthand carriage. Emboss = blue. Select Cardstock and the fine embossing tool. Send to cut - and the fold lines are embossed.
3 Re-insert the template into the Curio. Adjust the cut settings. Purple = cut, Ratchet Blade in the lefthand carriage. Deselect the blue. Select the purple. Choose Cardstock and Ratchet Blade. Send to the machine.

4 Repeat this process for the second half of the box. 
5 Join the two box pieces together, as shown above. Crease the folds. Join the end tab - your box is complete.

If you have the Silhouette Curio Long Base, you can enlarge the templates to make bigger boxes.


Monday 23 November 2015

Colour Block Pleated Globe Ornaments

Less is more! Today I have a colour block variation of the Pleated Paper Globes, as seen in yesterday's tutorial. This style really accentuates the starburst effect at top and tail.
 
Here are your free printable templates:
 
I have given you .pdf printables and a .studio file. You can print and cut the globes if you have a Silhouette Cameo or Portrait, or you can print, emboss, and cut the globes if you have a Silhouette Cameo.

However you make them, happy pleating. Enjoy making your seasonal decs!


Saturday 21 November 2015

Pleated Paper Globes Tutorial

These pleated baubles are great fun to make. Follow my tut - once you're up to speed you'll be turning these out by the dozen. As you can see, the print-and-cut designs are engineered to accentuate the pleats - and there's a lovely starburst top and tail of each ornament.

If you are lucky enough to own a Silhouette Curio digital papercutter, then you can used it to emboss the fold lines. I am proud to be on the Silhouette UK Design Team. I am currently exploring all the creative capabilities of the new Curio machine - and embossing for pleating is one of them.

If you are entirely handcrafting the ornaments, no worries - you can score the folds by hand using a fine-point embossing tool and a metal ruler. Instructions are given for both methods.

Here are your templates:
PleatedPaperGlobes.studio3 

PleatedPaperGlobes1of2.pdf 
PleatedPaperGlobes2of2.pdf 

Pleated Paper Globes Tutorial

Whether you are making the globes digitally or by hand, they are assembled in the exactly the same way. The difference is in the cutting out and prep.

You will need:

Photocopier card 
30cm (12in) of 3mm (1/8in) ribbon per ornament
A pony bead
Craft thread, tapestry needle
Double-sided tape or tacky PVA glue

By hand, you also need:

Fine-point embossing tool
Small metal ruler
1/16in circle hand punch or a piercing tool

Silhouette Curio Prep:
Select a design, slide it on to the mat. Print two.
A Open the file and turn on the registration marks. Select a design,
move it on to the mat on screen and print two copies. Trim your paper to fit the mat. Use the Curio embossing mat.
Blue lines = emboss. Fine emboss tool in righthand carriage.

B This design is Cut by Color. Place the fine embossing tool in the righthand holder and the ratchet blade in the lefthand holder. Adjust the cutting instructions on the right to indicate this. Blue = emboss, purple = cut. Move the folding guide over the globe design with edges aligned. Tick the box for the blue lines to activate them, turn off the others. Select cardstock and embossing tool and send the design to the Curio. 
Purple lines = cut. Blade in lefthand carriage.

C The fold lines are now embossed. Next, cut the edges. Turn off the blue lines and turn on the purple lines for "cut". Select cardstock, ratchet blade, then send to be cut.

You need two zigzag strips per ornament.

By hand:

A You need two identical zigzag strips per ornament. Print, then cut out  the ornaments with scissors. Emboss the fold lines using a fine-point embossing tool held against a small metal ruler. Punch the lacing holes with a hand punch or a piercing tool.

OK - from here on in the how-tos are the same - handmade with love!
1 Join two strips together to make one long strip. Overlap the join, matching the pattern. Use either double-sided tape or tacky PVA glue applied with a cocktail stick.
 

2 "Prime" the embossed folds so they will fall into place when you fold them for real. Crease the accordion folds both ways (this is called a "universal fold", according to papercraft guru Paul Jackson). Crease all the Vs. The short fold at the top of each V is a mountain fold.

3 Next, begin creasing for real on one side of the zigzags. Place your thumb on either side of the V and pop each fold - kind of like bubble wrap! The V-pleats will fall into place. 
4 Pleat the second side after you have finished the first. Result: a U-shaped crocodile (see above).
5 Join the strip ends to fom a ring (tape or glue, as before). Adjust the pleats so they bend inwards at top and bottom. Looking globe-like now (see inset)!

6 Thread a tapestry needle with craft thread. Lace through the pleat holes as shown. Begin and end at a strip join. Remove the needle. Next, thread a pony bead (big plastic bead used for hair decorations and kidcraft) onto a 30cm (12in) piece of ribbon.
7 Fold ribbon in half, slide bead to centre. Knot ribbon above the bead. Also knot the ribbon 8cm (3-1.8in) above the bead. Pop the beaded end of the ribbon into the opening on the threaded side of the globe. Draw up the threads and knot them. Trim thread ends.
8 Lace the bottom of the globe, draw up and knot the gathers as for top. (To add the surprise factor, pop in a jingle bell before you tie the bottom.) The pleated globe is now complete! You might want to add a bow at the top, but there's plenty going on with the pleats already!:)

If you are now hooked on pleating and want to discover more, you can check out this fab new title from Paul Jackson:
Now that you know how, you can deck the halls with pleated globes.

If you prefer plain to fancy, click on the link for color block pleated globes made exactly the same way.


Saturday 14 November 2015

Ski Sweater Print

Today is #WorldPatternDay. In recognition, here is a Ski Sweater print that you can use for papercrafting or gift wrapping small items:

SkiSweaterPrint.pdf 


Wednesday 11 November 2015

Paper Goods Projects, by Jodi Levine. Review.


Coffee filter flowers, doily butterflies, cupcake paper cards, and 57 more

crafts made with supermarket finds

By Jodi Levine

Pottercraft 2015

Paperback, £12.99 UK, $16.99 US, $19.99 UK

ISBN 978 0 8041 8695 7


Star rating: ****


This book of crafts-to-do-with-your-kids has a very strong  and timely concept:  re-purposing (and recycling) supermarket paper products to make craft creations. The author, Jodi Levine, has very strong craft credentials – she was on staff at Martha Stewart in various craft-y editorial posts for 19 years. 


All the projects in this book are easy and many are genius in their simplicity. So very simple that you may marvel –“why didn’t I think of that?”! The book is divided into the following chapters: Coffee Filters and Cupcake Papers; Paper Plates; Bags and Doilies; Balloons (yes, a cheat – but are you complaining?); and Recycling Bin.


The fluted appearance of cupcake liners and coffee filters, of course lends itself to paper flower-making – and that’s what you get here.  The author also takes advantage of the fact that coffee filters wick up liquid and are therefore very dyeable – cue dip-dye effects with food colouring. The ribbed edging of paper plates is engineered to make a variety of masks – love the peekaboo lion’s mane mask and the bunny.

Other cute projects include the Paper Bag Animal Favor Bags – playful woodland creatures created with paint and a few deft folds. The author is particularly good at re-purposing cardboard tubes. The Sea Creatures Mobile is very clever – sharks with serrated teeth and an octopus with curly tentacles. Big fun. Also here: a brilliant take on the super-graphic typographic letters trend. Usually this entails curvy-cutting and much tab-gluing, but by cutting letters out of carboard tubes the process is streamlined and only cutting is required. Nice work!


The step-by-steps are text-only – but the projects are simplicity itself, so this suffices. There’s a template section back-of-book, some same-size, some reduced, others enlarged. There’s also an index, which seems a bit overkill in a book of this nature – but I think that has to do with the publisher’s style. 


This title would make a nice gift for someone you know in nursery or childhood education, or for any Mum with kids to entertain and occupy. Many of the projects could be made as kids' party activities.